To kill a meniscus
Where the meniscus isn't really killed but ins and outs of fluorescence and the confocal version are discribed
Readers, I was underwhelmed by the outpouring of your suggestions. Evidently you all are as ill equipped as I at hunting menisci. Is anyone reading this? Maybe I need to add some pictures of nude scientists? Or not. As it happens, I once did see a pair of totally naked scientists, a Nobel prize winner no less. They had invited me for tea but I arrived before they had quite finished their afternoon sun bath. No pictures though, and I suppose telling a story about naked celebrity scientists doesn’t count. But this passage certainly has given Dan Brown the name for his next band of scared evildoers: The Menisci!
Moving right along. This past week has to be considered quiet, not to say boring. I spent rather little time in the lab. I did come up with an idea for taming the wild meniscus, involving that six-well dish from the last post and a nylon washer. Put the washer in the bottom of the well: the stem segments are corralled inside the washer, safely out of the way of the curvy part of the meniscus. I got a free sample of an appropriately sized nylon washer from an outfit called Essentra, thanks folks, and tested it on some pieces of pipette tip, which seemed OK. This coming week, I will try with actual plants. I am not sure that this embodies the perfect solution, because the whole surface of the water is curved and hence potentially distorting. But, by taking the really curved edges out of the picture, the washer trick might allow preliminary experiments to be done, which do not require ultimate accuracy.
The other thing I did in the lab was to make more confocal movies of growing roots. I described some of this in “A rose by any other name”. To remind you, I want to be able to follow the motion of each cell, really each cell wall, as it moves in the root because of growth. To do this, I can use a line of lab weed that has fluorescent cell walls (ok, strictly speaking the plasma membranes are fluorescent, but if you look at the picture, re-posted here, the fluorescence – green signal—you can see how each cell is outlined, so I can follow the edge of each cell, be it cell wall or membrane). I image the line in the confocal microscope (that is how the green side of the posted image was made) and take an image every so often as the root grows. Collaborators here at the UoN will, I hope, be able to develop image analysis software that will get the trajectory of each wall is it moves. My job is to take some sample movies to give them something to work on.

Lab weed root. Transmitted light on the left; florescence on the right.
To get these sample movies, I began by using the ‘easy’ confocal microscope. To convey what is at stake here, I will digress to talk a little about fluorescence microscopy in general and the confocal in particular. Fluorescence microscopy is hugely popular today, and by popular I mean used a lot. The reason is because fluorescence is intrinsically high contrast. Contrast means the difference between the thing you are interested in seeing and the background. Stars do not go away during the day, they are simply not contrasted because the difference in intensity between their light and the light from the sun bouncing around the atmosphere is too small. In “regular” microscopy (which is called ‘bright-field’), the background is bright and things you are interested in, say a chloroplast, absorb or scatter light and so they are a little less bright. In contrast, in fluorescence, the background is dark as the night sky, and objects you are interested fluoresce. It turns out that our eyes use the ratio of intensity between object and background to create contrast. Considering the two examples, for bright field we might have 100 units of light in the background and 95 units in our object and a ratio of 1.05; whereas for fluorescence, we have 1 unit in the background (it might look dark but there is never ever zero light) and 3 units of light in the object, for a ratio of 3. In percent terms, this is 5% vs 200%. That is at the heart of the popularity of fluorescence.
Now, what about confocal? Contrast isn’t everything. Confocal is an implementation of fluorescence microscopy that ameliorates a big problem. Microscope optics work ideally at the surface of the coverslip. As one focuses into the sample, leaving the safe haven of the coverslip, the light waves get distorted by irregularities in the sample (unlike the lenses and microscope body, the sample is not a piece of precision engineering). With a depth of about a cell, these distortions are fairly severe. These distortions meant that, prior to the invention of confocal methods, high resolution light microscopy had to be done either in cell cultures, particularly using cells that happen to be quite thin, or in material that was fixed, embedded, and sectioned. The latter business is not only tedious but prevents study of anything alive. The essence of the confocal technique is to compensate for sample irregularities and allow decent images to be obtained reasonably far from the coverslip surface – that is, in thick and even living samples.
In the last sentence, the alert reader will have noticed the weasel words “decent” and “reasonably”. These are gray areas and huge effort is expended to make images better than decent and at distances that are perhaps unreasonably far. Nevertheless, today’s confocal represents a manifest improvement and is allowing high resolution work in thick objects, most importantly in living ones. This is clear enough in the figure above. The left hand image is a bright-field image, the right-hand one a confocal fluorescence one. The bright-field image is a summation of all image planes and reveals little in the way of cellular detail; the fluorescence image represents more or less a single focal plane and each cell wall in that plane shows up clearly. When one focuses up or down, new cell walls come into focus and the ones observed disappear.
Welcome to the joys of confocal. I am not going to explain how the confocal does this; I don’t understand it all that well myself and anyway it would take ages and pages. But for what comes next, I do need to explain that the hardware to ‘confocalize’ a microscope essentially bolts on to an existing scope. I mean, the light is specially prepared, sent into the microscope, and then when it comes back out again modified by the sample, specially detected. The confocal bits then can be visualized as a box that prepares and detects light as needed and this box is attached somehow to the microscope.
Bright-field and fluorescence are different imaging modalities; another important distinction among microscopes is how the sample relates to the objective lens. In the common or garden microscope (figure), the sample goes below the objective. This is called an upright microscope. But the other way exists too, where the sample goes over the objective (figure). This is called an inverted microscope and you might think it inverts common sense. But it has its uses. For one thing, when you start hanging boxes on the microscope, as needed for confocal or cameras or fancy light sources, they vibrate less in the inverted mode. If you have to work on your sample, for example with micro-electrodes, the inverted mode provides more room because the condenser lens (the one that puts light on the sample) can be a lot farther away than the objective (as a rule). Finally, if your sample is living, it might not be too happy with a coverslip on its head, but it can sit on a coverslip without much trouble. In the inverted mode, the coverslip is on the bottom and although this is a little fragile, with care there is no problem.
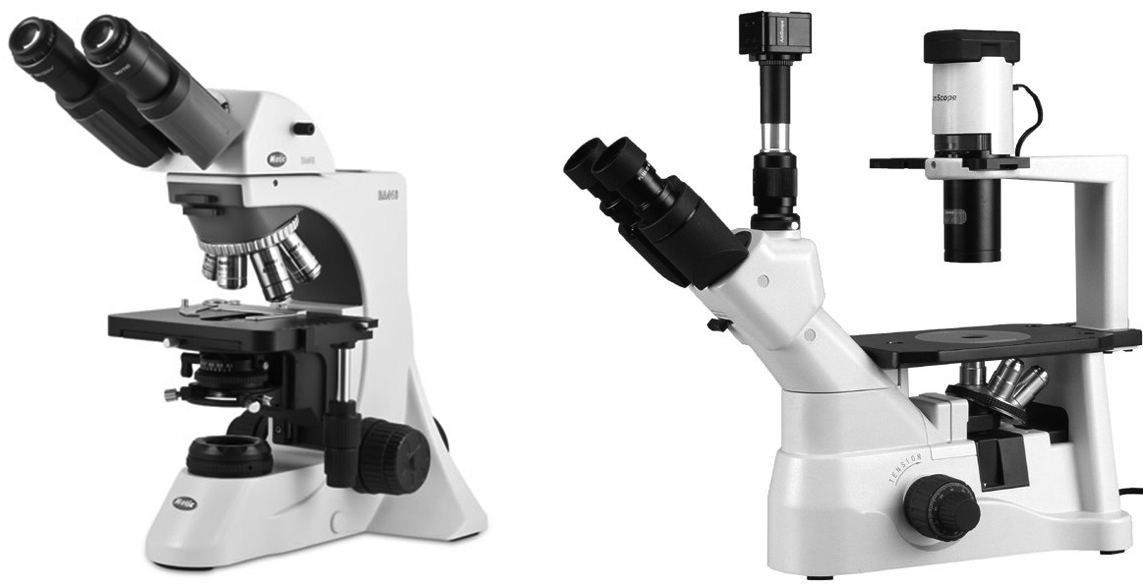
Upright microscope (left) and inverted microscope (right)
With all that background, I can return to CPIB and the lab. The most used confocal here is on an inverted microscope. It is a Leica SP-5, quite new and popular. I started out using it to make movies. I made a few this past week, as well as the week before. It is a good instrument for a beginner to use because it practically runs itself. But, always a but. Lab weed seedlings grow on Petri dishes (see The Yawn of Time). Heck, here is picture. To image them on the inverted confocal, I have to pick the seedling up from the agar surface and put it in a small chamber with a coverslip bottom for imaging. While that works, in the sense that images can be made and the root keeps growing, the problem is that the root curves around in the small chamber, it is bent and so it tries to un-bend. The root moves for other reasons than growth. This causes an unneeded complexity for my movies.
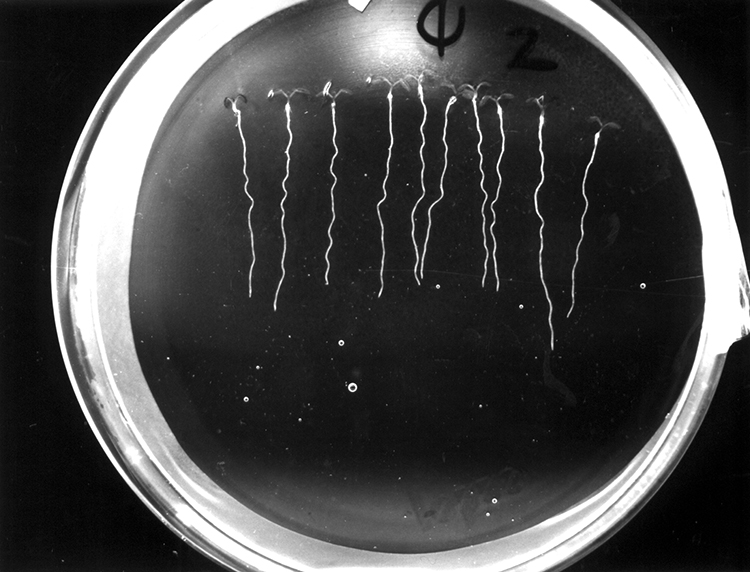
Lab weed seedlings seen in their natural environment, the Petri dish.
An obvious solution to this is to use the upright confocal. There is one at CPIB, though kind of old. This is far easier on the root, one can just put a coverslip right on the root on the agar in the Petri. The root doesn’t mind this (we do this back home). Nevertheless, there is a thing. Roots by nature grow down, to the center of the Earth (well they are responding to gravity because rooty things like soil and water tend to be in the direction of the center of the Earth. Likewise, shoots grow away from the Earth to get light and carbon dioxide, both being rather scarce in the ground. When we grow lab weed on Petris, we stand the plates up on end, allowing the roots to grow down towards Earth, as they prefer. But when we put a seedling on the microscope stage, whether in a chamber on the inverted or in a Petri on the upright, we point the root sideways to Earth. The root responds: it starts growing down. This response is called ‘gravitropism’, a turning in response to gravity.
By 15 or 20 minutes after turning a root horizontal, gravitropism is well underway. Insofar as the growth studies I am interested in doing will take an hour or two, I am faced with gravitropism going on simultaneously. An unwanted complication. What is a poor scientist to do? Well a poor one, maybe nothing. But one lucky enough to be working at CPIB can take advantage of their horizontal confocal. Yes! This instrument lets one image the root while it grows in the ordinary way down towards the Earth. Now before you start conjuring up images of a upright microscope lying on its side like an odalisque on a divan, this instrument is actually an inverted microscope combined with a periscope. The latter holds the objective, and only the objective, horizontal in front of a vertically oriented Petri dish of seedlings. The excitation light goes through the periscope reaches the sample, and the excited light comes back through the objective and periscope, and images happen. It is tricky to navigate because the periscope has all kinds of mirrors so everything goes up down and sideways but I am told one can cope with practice.
I decided this past week that since I need this horizontal operation for my ‘real’ experiments, and since the chambers needed for the ‘easy’ inverted are causing ancillary hassles, I might as well get started learning my way around the periscope. So, plants are plated and the week after next, vertical movies will happen. Or that is the plan!
If you are using an inverted scope then your title suggests another potential solution to the meniscus problem.
The obvious sequel to “To kill a meniscus” is “Go set a watchglass” – but obviously there was a delay in this thought..
A watch glass is a premade chamber that will actually encourage the sample to centralise – although… thigmotropism….